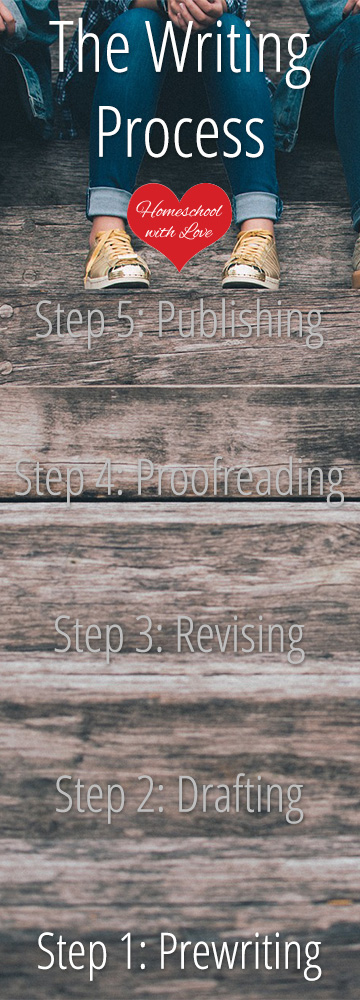
Step 1 of the writing process is Prewriting.
This is where your child makes decisions, gathers information, and plans things out for his paper.
It is a very important step because it prepares him for writing.
Let’s look at how to teach your child prewriting.
The Writing Process Step 1: Prewriting
Decide on a Topic
Choosing a topic is the fun part for the child. She gets to decide what it is that she wants to investigate further and become an “expert” in. If she struggles to think of a topic, ask her to consider these questions:
- What do you like?
- What are your interests and hobbies?
- What do you want to know more about?
- What have you studied recently that you found interesting?
- Are there any books or magazines that you read recently on a topic you want to know more about?
Tell her to be careful that she doesn’t pick out a topic that is too broad (like dogs or cars) or too narrow (not enough info available).
Why and Who?
Now your child needs to think about the “why” or the purpose for the paper. Is it to inform people? Is it to persuade? Is it to teach someone how to do something? Is it to entertain?
Then he should think about the “who”? Who is the audience for this paper? You write differently for a child than you would an adult, right? Or imagine writing a “how to” for a senior citizen? That would be a different style than one for a 30 year old adult.
These two questions help your child develop more focus for his topic. It also gives him reasons for writing it.
Time to Research
Now your child gets to start her investigation. Here are some sources of information:
- Library books and ebooks
- Magazines and newspapers
- The internet
- Interviews (she could interview someone who knows her topic well)
- An encyclopedia, atlas, almanac or other reference book
Taking Notes
There are different ways for kids to take notes. I’ll share some with you here.
Note Cards
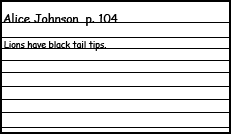 Using 3″ x 5″ index cards is a handy way to take notes. The top of each card should tell where the source came from. If it was a book, then she can put the author’s name and the page number. If it was a website, she can write the short version of the web address at the top. The short version looks something like this:
www.sitename.com
*Here’s a little info on the parts of a web address. The “http://” stands for Hyper Text Transfer Protocol. It’s the “rules” used for communication between the web server and a web browser like Internet Explorer, Chrome, or Firefox. The “www” is the server. The “sitename.com” is the domain name and can be a .com, .org, .us or a host of other possibilities. Everything else after that indicates specific folders and/or files on the website. Now that you are an expert on web addresses, let’s get back to note cards.
The rest of the card should have one fact or idea that your child needs for her essay. If she puts more than one, she will have a tough time when we get to the next stage which is organizing.
Notebook Paper
 Notes can be taken on notebook paper instead of index cards. Here is how to do that.
At the top of one page, have your child write the title and author of the source. If it is a website, he can put the title of the article and the short version of the website as I described above. Now all of the notes on that page, and perhaps a few more pages after, will be from that source.
Each note should have only one fact or idea. Your child should skip a line between notes. He should also write on only one side of the paper. The page number should be listed next to the note in the left margin. Finally, he should decide on a different color for each source and put a colored dot in two places. One is next to the title of the source. The other is to the left of the page number. So if your child has notes from a book entitled “Big Cats of Africa”, he should put, for example, a red dot next to the title and a red dot next to each note from that book. Why the color coding? You’ll see in the next step.
Organizing the Notes
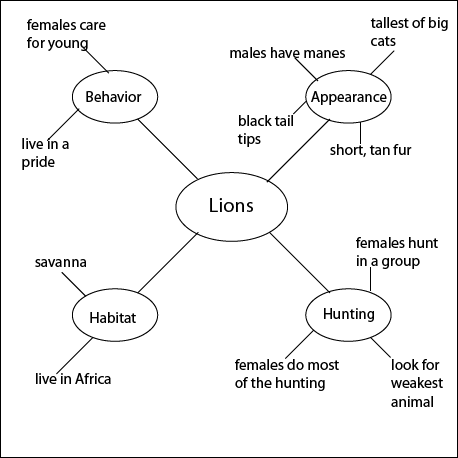
Now it’s time for your child to put her notes into piles. She is going to sort them into points for her paper. So, if she was writing about lions, she might have piles for habitat, behavior, appearance, and hunting.
If your child used the note card method for taking notes, she can just put them into the piles. She’ll know where she got her info from because she put the author’s last name at the top of each one (or some other info about the source).
If your child took notes in a notebook, she should cut the notes apart. That is why she only wrote on one side and skipped lines. The color coding is so that she knows which source the info came from.
She may find notes that don’t fit into points as she is sorting. Just have her put them aside for now. She may find that she doesn’t need them.
Create an Outline or Map
Finally, your child gets to put everything in order. Here are some ways that an essay can be organized:
- Chronologically
- By order of importance (either most important to least or vice versa)
- Compare and contrast
- Cause and effect
- Problem and solution
Once he decides on a method, he can write it out in either an outline or a map format. IMPORTANT: This should just be a general guideline for him at this point. He may find that he needs to change the order as he writes his essay. That’s OK. That is why it is so important for kids to understand that the writing process is flexible.
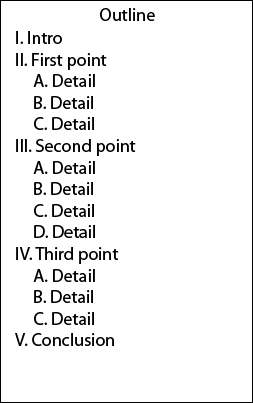
If he decides to write an outline, here is how it might look.
If he would rather do a map, it might look like this for a lion report.
Whew! That was a lot of work. Step 1 of the writing process is one of the biggest ones and could take a week or more. It’s an important step, though. Now you’re on to Step 2.
